
 Short Bytes: How to set up a VPN in Windows 10? — This question is often asked by many Windows 10 users. This is so because Windows 10 has different network settings user interface than its previous Windows versions. Apart from that, to set up a VPN in Windows 10 takes different procedural steps. So, follow our guide to know how to set up a VPN connection in Windows 10.
Here are steps on to set up a VPN in Windows 10:
How to set up a VPN in Windows 10:
Before following this procedure, you need to log in to your Windows 10 with administrative privileges and then follow the below steps
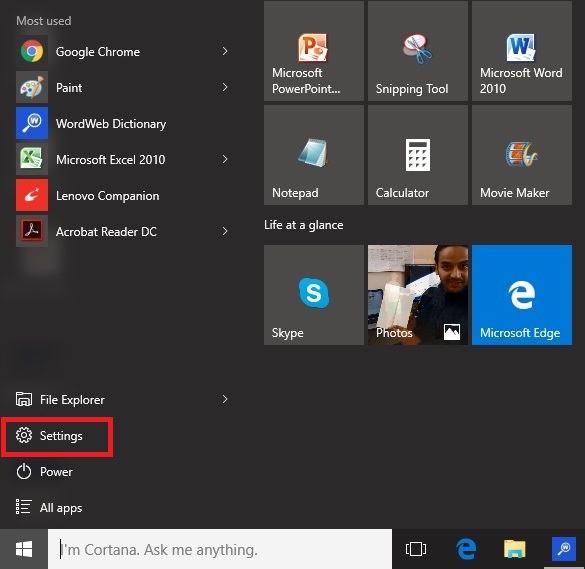
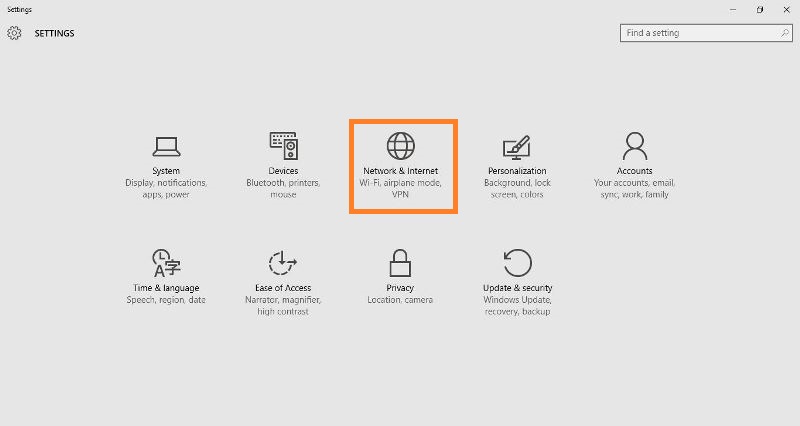
- Open Settings of your Windows 10 computer to get started with setting up a VPN in Windows 10.

- Click on “Network and Internet” icon and open the relevant settings.

- On the left panel, click on VPN and VPN setup window will open.
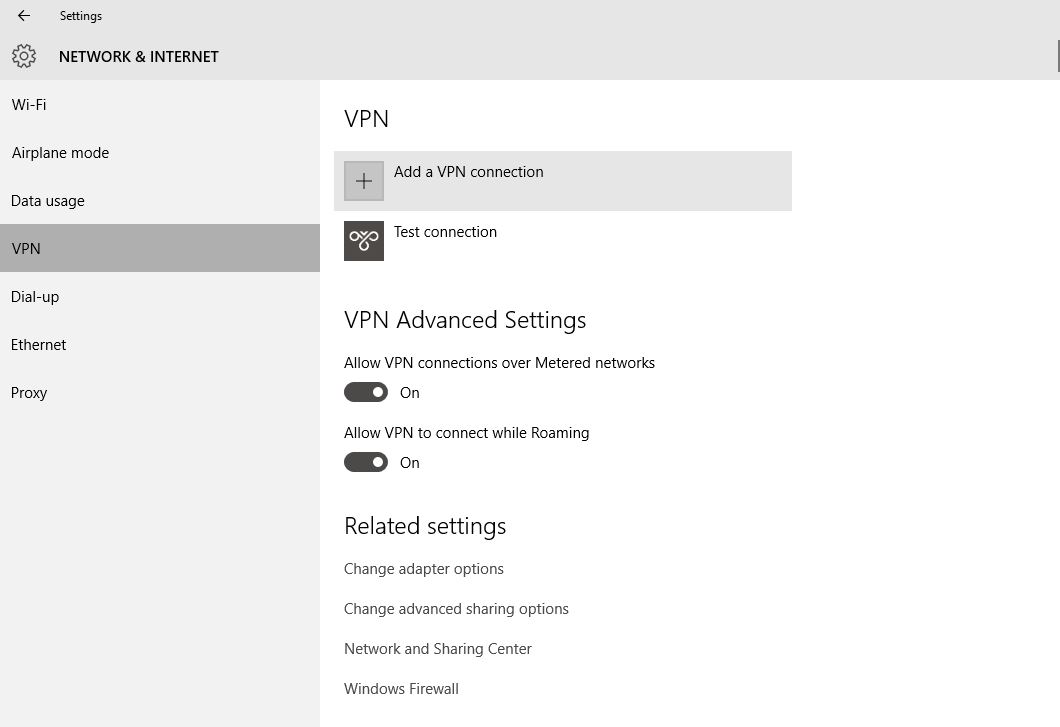

- Click on “Add a VPN connection” and a new window will open up to set up the VPN in Windows 10.
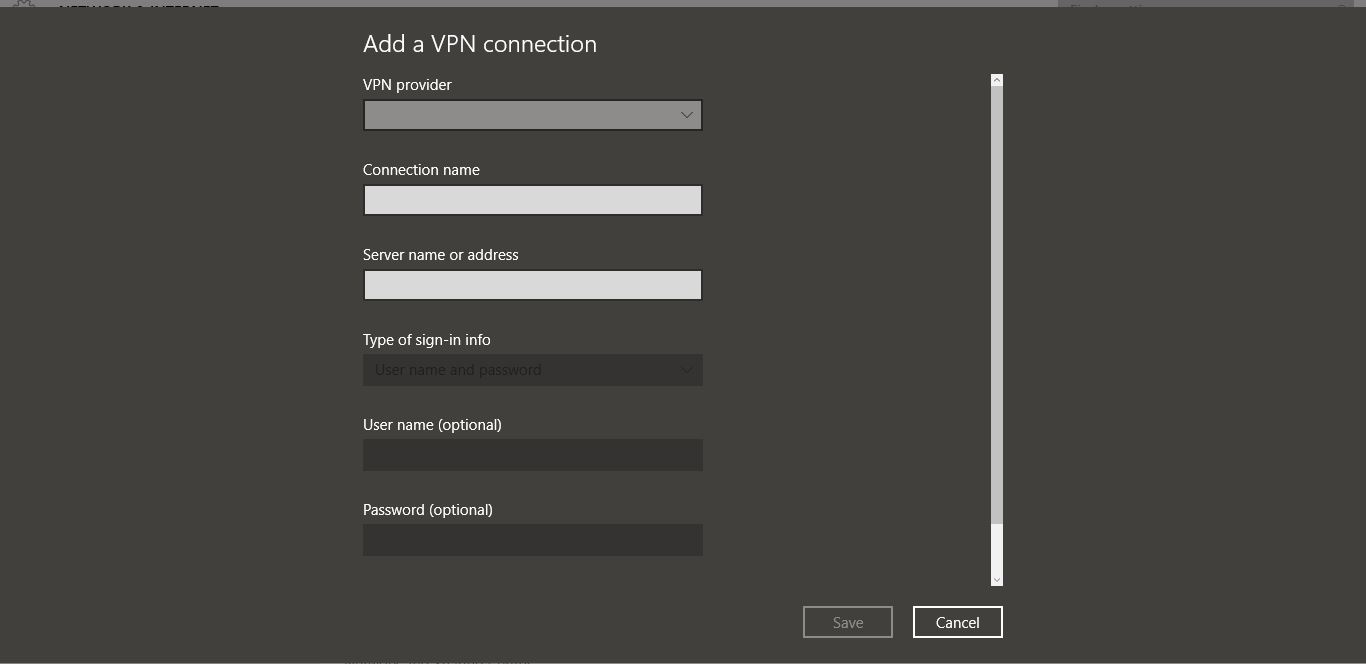

- Fill up the following details under “Add a VPN connection” Window
- Select Windows (built-in) under VPN provider
- Give a connection name as per your choice
- Enter server name or Address
- Under the VPN type, select “Point to Point Tunneling Protocol (PPTP)”
- Under the “Type of sign-in info”, select one of the options of your choice
- Enter Username and password, if necessary
- Check “Remember my sign-in info” at the bottom to avoid logging in again and again in future
- Finally, save
- Now you will see, the new added VPN connection under the VPN Windows
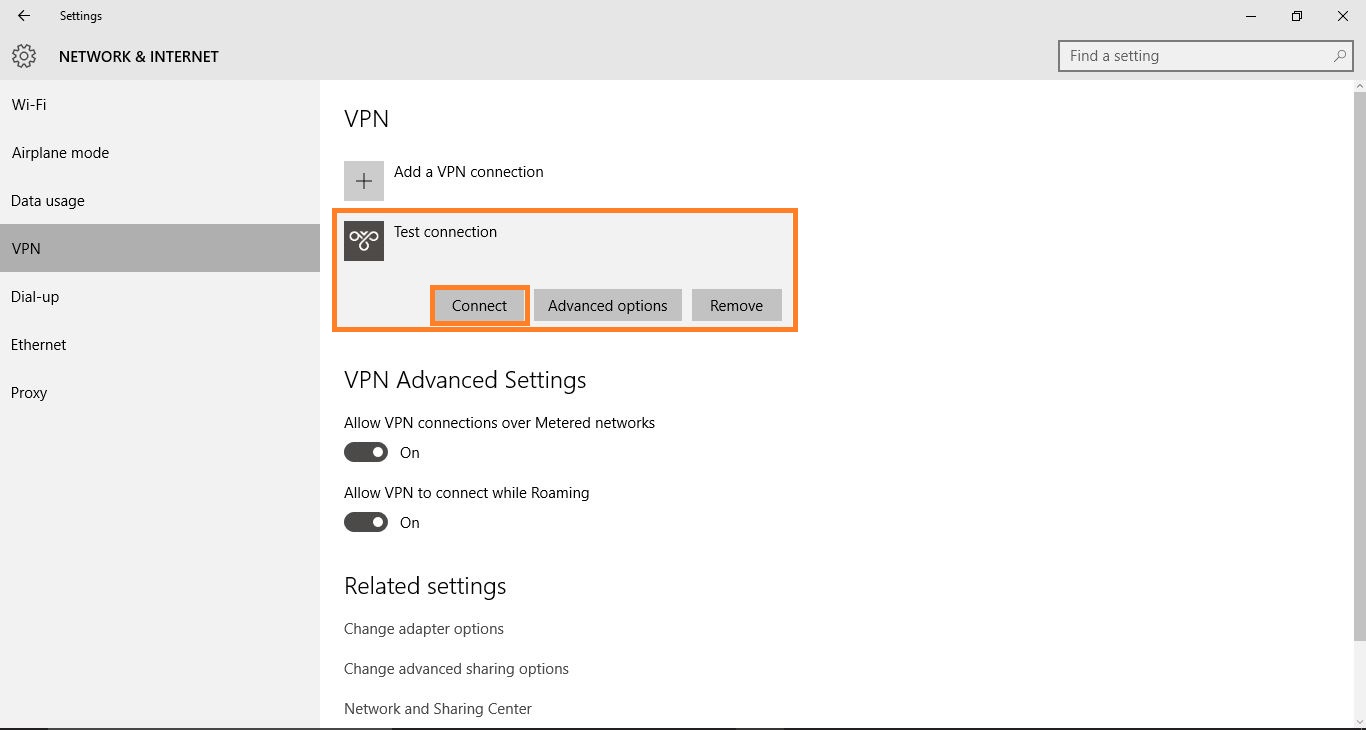

- Click on that newly added VPN connection and click on “Connect” and that will connect you to your server
- If you want to re-edit the information of your newly added VPN, click on Advanced options just beside “Connect”
- Advanced options will show you connection properties of the newly added VPN. Click on Edit to re-edit the VPN information.
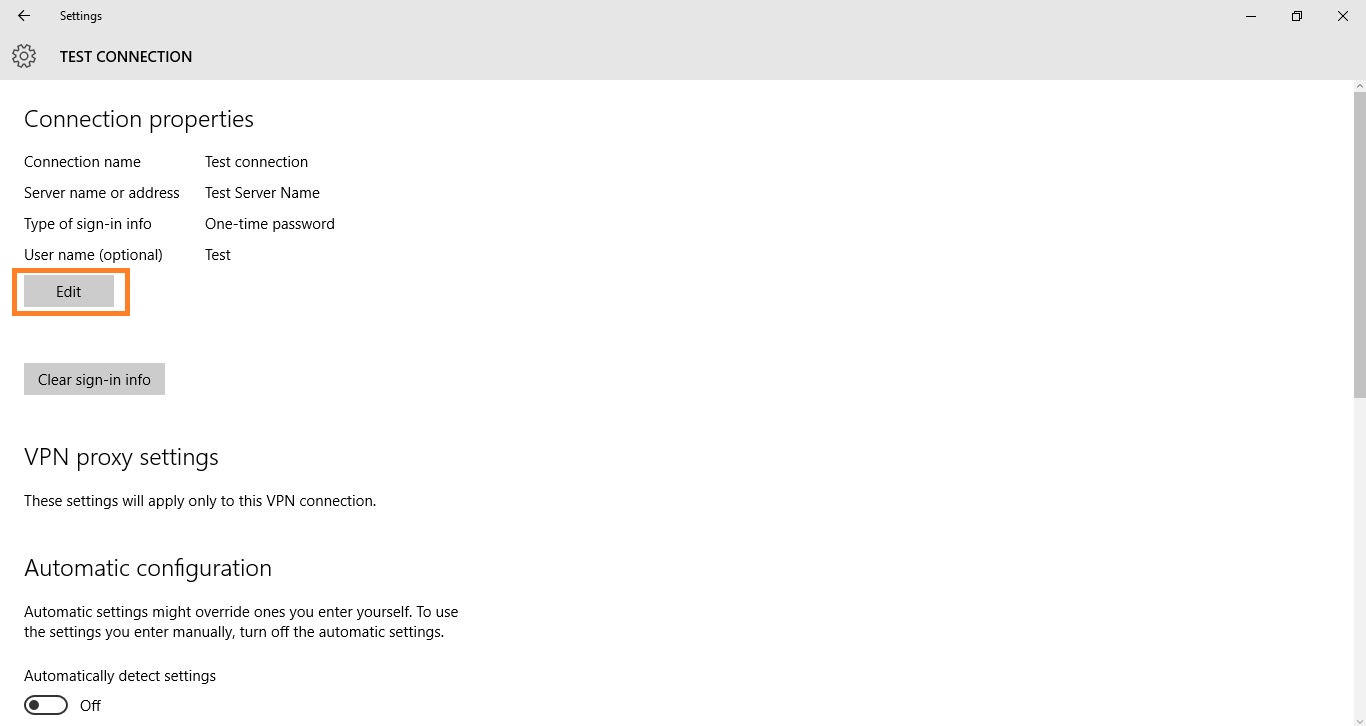

You can also click on “Clear sign-in info” just below the “Edit” option in the above picture to clear your password/ username or OTP for your VPN connection on Windows 10.
Also Read: 10 Best Free VPN Services Of 2016: Which One Shall I Choose?
I hope that you found our article “How to set up VPN in Windows 10” useful. If you know some other methods to set up a VPN in Windows 10, or some other trick, let us know in the comments below.