Overview
In the last chapter (Azure cloud security tutorial series – Chapter 2 [Virtual Network]) we saw on how to create VNet in Azure. Once you have VNet created its time to add resources to it. It like once you have your virtual network created you will add computers, servers and other types of devices to it, as the network is private to you. In this chapter we will show you on how we can add 2 virtual machines to our VNet/subnets. To recap in last chapter we added one VNet and added 2 subnets to our VNet. Now in this chapter we will add one Virtual machine in each subnet.
Create a virtual machine in the virtual network
In this we will create a virtual machine in subnet1
- To access the Azure portal, go to http://portal.azure.com
- Click on All services > Compute > Virtual machine
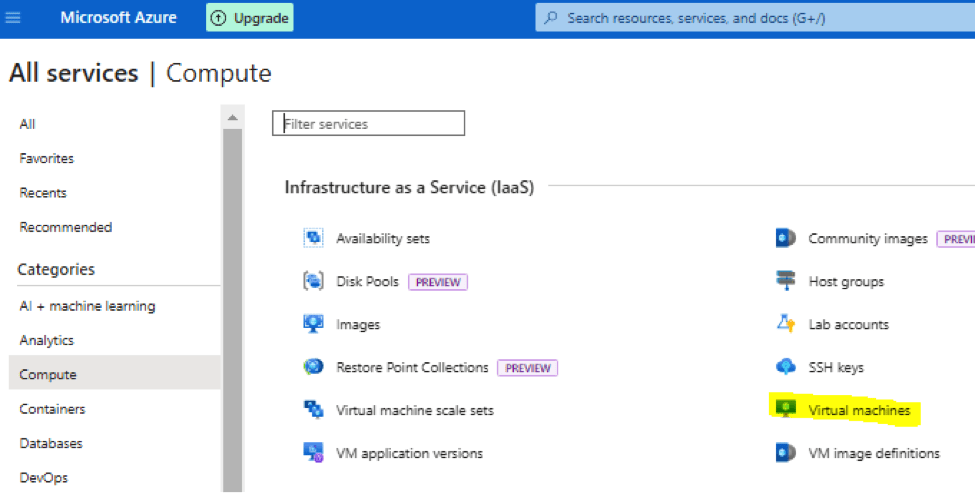
- Hover your mouse over it and you will see + sign. Click on + sign and you will land up in below screen:
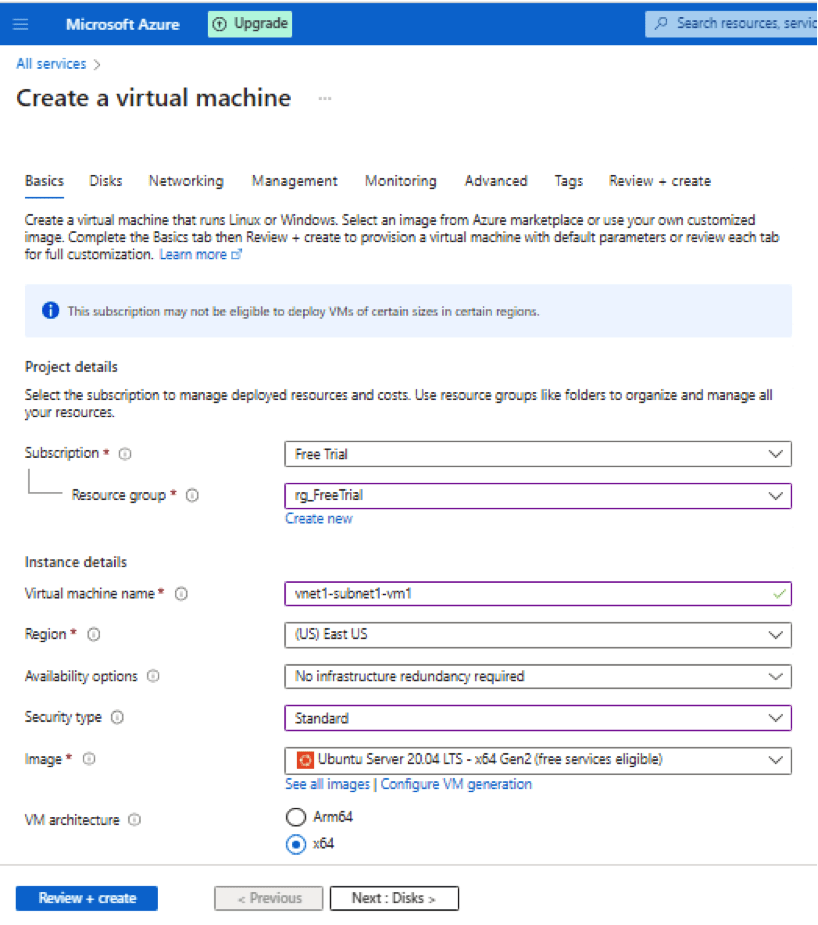
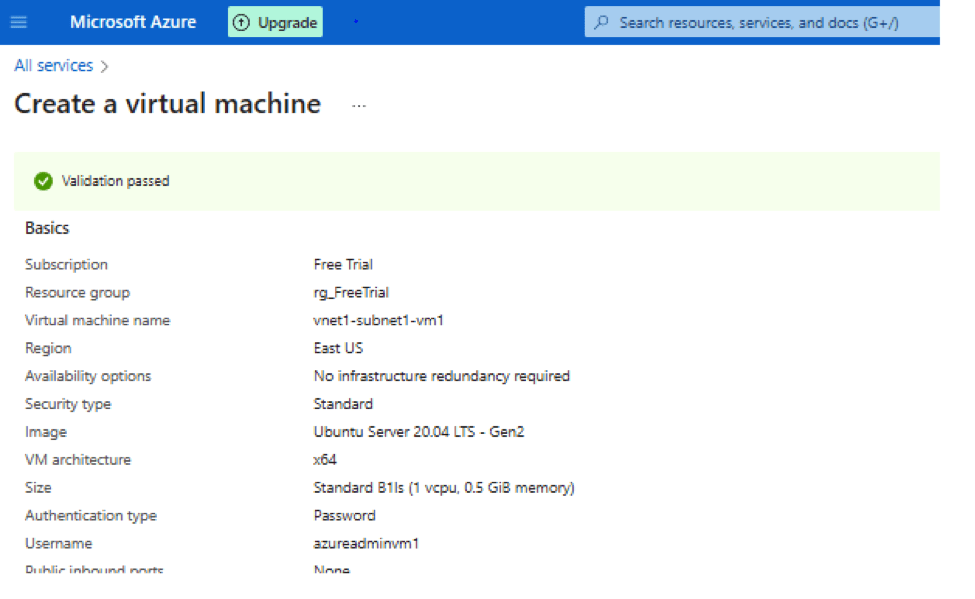
We will talk about all the options to select:
Subscription – Free Trial
Resource Group – rg_FreeTrial
Virtual Machine Name – vnet1-subnet1-vm1
Region – Us East US
Availability Option – This options help to keep backup of your resource in case of any failure.
Security Type – Its like how you want your virtual machine to be accessed. You want to have a simple lock or a stronger lock for additional security.
Image – Choose the Base image of the operating system. In the other words it’s the operating system you want to have in your Virtual machine.
VM Architecture – It talks about the CPU architecture of virtual machine
Run with Azure spot discount – Its like getting deal on your hotel booking being that you are flexible on your timing. If you choose this option in Azure while creating Virtual machine, you are saying that you are fine to grab discount on cost by using it when its available. There can be chances if someone is willing to pay more for it, you might can lose it.
Size – There are many different type of Virtual machine sizes Azure provides. Azure does this by providing VM series as explained below:
A-Series: These are basic virtual machines, which are suitable for basic working, you can use them for webservers and small databases.
B-Series: B stands for Budget. These Virtual machines are good for work where you need variable performance. They can not take too much load but you get good performance temporarily when required but return to lower performance when not in use.
D-Series: These types are Virtual machines are used when you require high CPU and memory. They are good for remote working and hosting application, large databases.
E-Series: Virtual machines are more designed for providing memory and computational power. They are suitable for memory intensive applications, data warehousing and real time analytics.
F-Series: Virtual machines that require high CPU commonly used for gaming servers, scientific modeling.
G-Series: Virtual machines designed for lot of memory and computational power, they are ideal for SQL server workloads.
H-Series: Used for complex scientific computation. They provide powerful CPU and GPU.
L-Series: VM that require large amount of local storage like big data applications.
M-Series: VM that require lot of memory and fast storage suck as relational databases and big data workloads.
N-Series: VM that require GPU enabled and are used for graphic intensive workloads like gaming and AI/Machine learning.
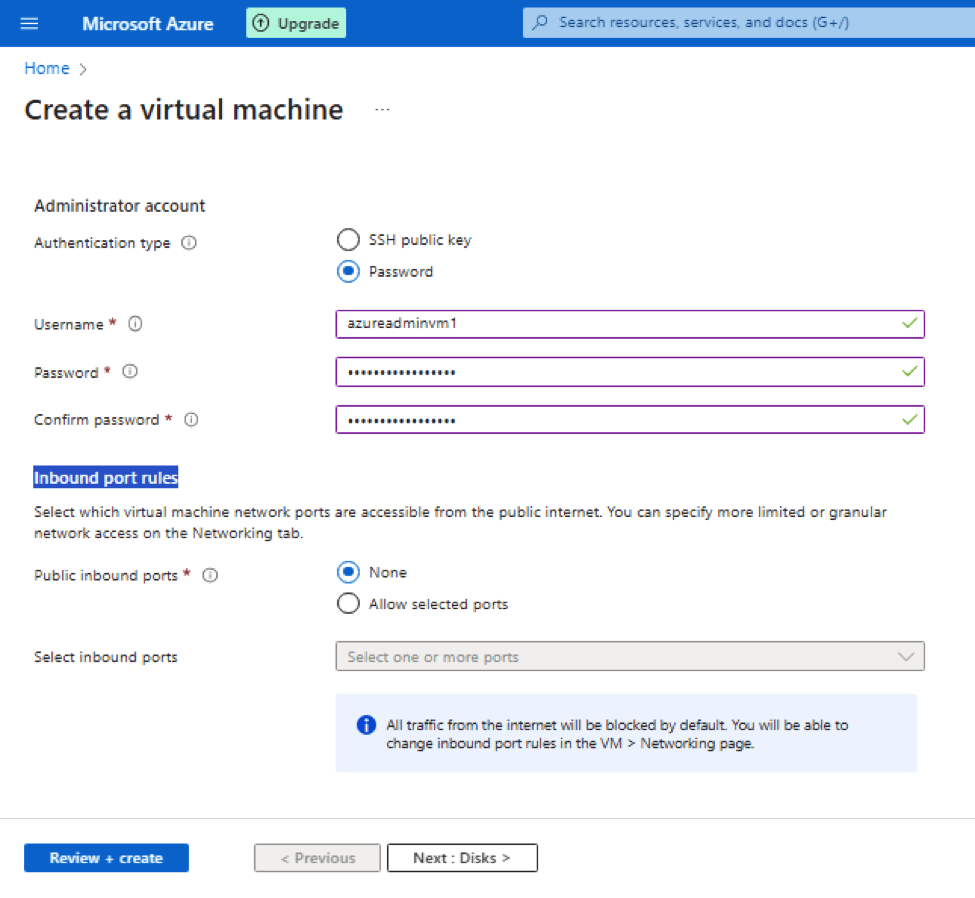
Administrator account – Mention the way you want to connect to Virtual machine wither through password less way (.i.e. is with SSH key) or using password
Inbound port rules – Keep it to None. We talks about which ports are allowed from outside world or public internet. None means everything is blocked from outside or public internet.
- Click Next : Disks, you will get following options
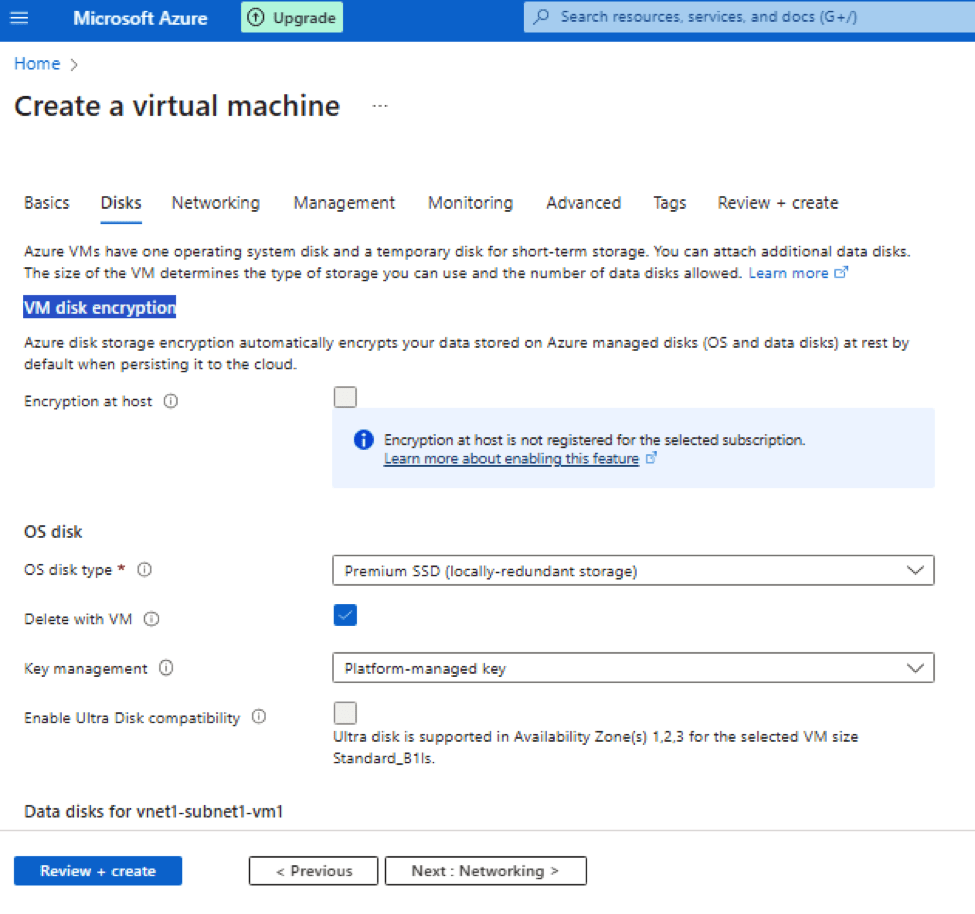
When you create Azure VMs it provides one operating system disk and a temporary disk for short-term storage. You can attach additional data disks. The size of the VM determines the type of storage you can use and the number of data disks allowed.
This page talks about configuration of these 2 types of Azure managed disks, one operating system disk and a data disk if configured.
VM disk encryption – It is used to encrypt your data stored in Azure managed disks (OS and data disks). As said Azure disk storage encryption automatically encrypts your data stored on Azure managed disks (OS and data disks) at rest by default when persisting it to the cloud.
OS (Operating system) Disk type – Azure provides following types of disks that go with your Virtual machine for storing operating system. The following table provides a comparison of the five disk types to help you decide which to use. Refer https://learn.microsoft.com/en-us/azure/virtual-machines/disks-types
| Ultra disk | Premium SSD v2 | Premium SSD | Standard SSD | Standard HDD | |
| Disk type | SSD | SSD | SSD | SSD | HDD |
| Scenario | IO-intensive workloads such as SAP HANA, top tier databases (for example, SQL, Oracle), and other transaction-heavy workloads. | Production and performance-sensitive workloads that consistently require low latency and high IOPS and throughput | Production and performance sensitive workloads | Web servers, lightly used enterprise applications and dev/test | Backup, non-critical, infrequent access |
| Max disk size | 65,536 GiB | 65,536 GiB | 32,767 GiB | 32,767 GiB | 32,767 GiB |
| Max throughput | 4,000 MB/s | 1,200 MB/s | 900 MB/s | 750 MB/s | 500 MB/s |
| Max IOPS | 160,000 | 80,000 | 20,000 | 6,000 | 2,000, 3,000* |
| Usable as OS Disk? | No | No | Yes | Yes | Yes |
Key management – Suppose you a storing very confidential data on the Azure managed disks you can use Azure provided key or generate your own keys for encryption and decryption.
- Click Next, to move to Networking section
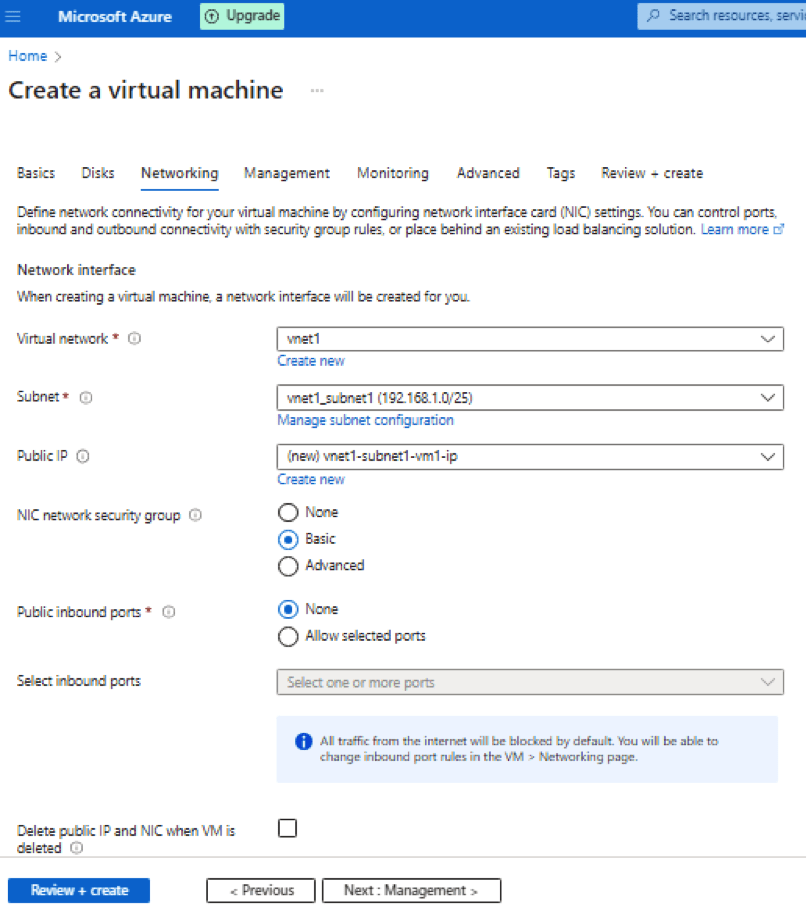
Virtual Network – Select vnet1. Definition as stated by Azure:
Virtual networks are logically isolated from each other in Azure. You can configure their IP address ranges, subnets, route tables, gateways, and security settings, much like a traditional network in your data center. Virtual machines in the same virtual network can access each other by default.
Subnet – Select vnet1-subnet1. Definition as stated by Azure:
A subnet is a range of IP addresses in your virtual network, which can be used to isolate virtual machines from each other or from the Internet.
Public IP – Use a public IP address if you want to communicate with the virtual machine from outside the virtual network.
NIC network security group – A network security group contains security rules that allow or deny inbound network traffic to, or outbound network traffic from, the virtual machine. To simplify management of security rules, it’s recommended that you associate a network security group to individual subnets, rather than individual network interfaces within the subnet, whenever possible.
Public inbound ports – None
By default, access to the virtual machine is restricted to sources in the same virtual network, and traffic from Azure load balancing solutions. Select None to confirm, or choose to allow traffic from the public internet to one of these common ports.
Delete public IP and NIC when VM is deleted – check it
Public IP addresses and NICs persist independently from the virtual machine. You can choose to automatically delete the public IP address and NIC when the associated virtual machine is deleted
Load balancing – We don’t have load balancer, leave it default
- Click Next to move to management Tab
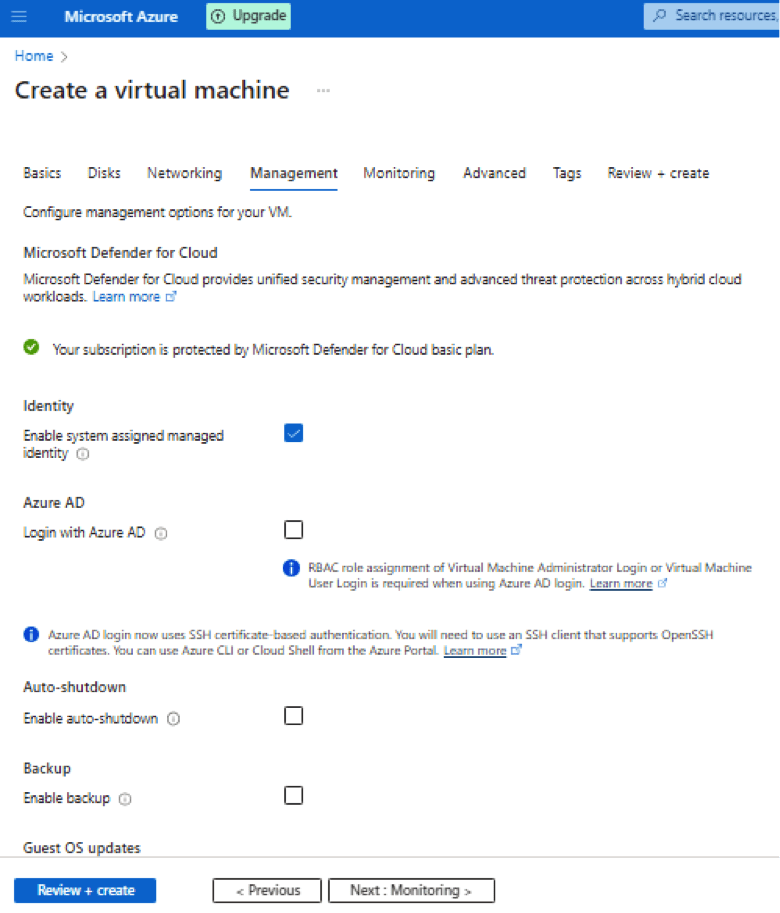
Enable system assigned managed identity –
A system assigned managed identity enables Azure resources to authenticate to cloud services (e.g. Azure Key Vault) without storing credentials in code. Once enabled, all necessary permissions can be granted via Azure role-based access control. The life cycle of this type of managed identity is tied to the life cycle of this resource. Additionally, each resource (e.g. Virtual Machine) can only have one system assigned managed identity.
Login with Azure AD –
Use your corporate Active Directory credentials to log in to the VM, enforce MFA, and enable access via RBAC roles.
Keep other setting default
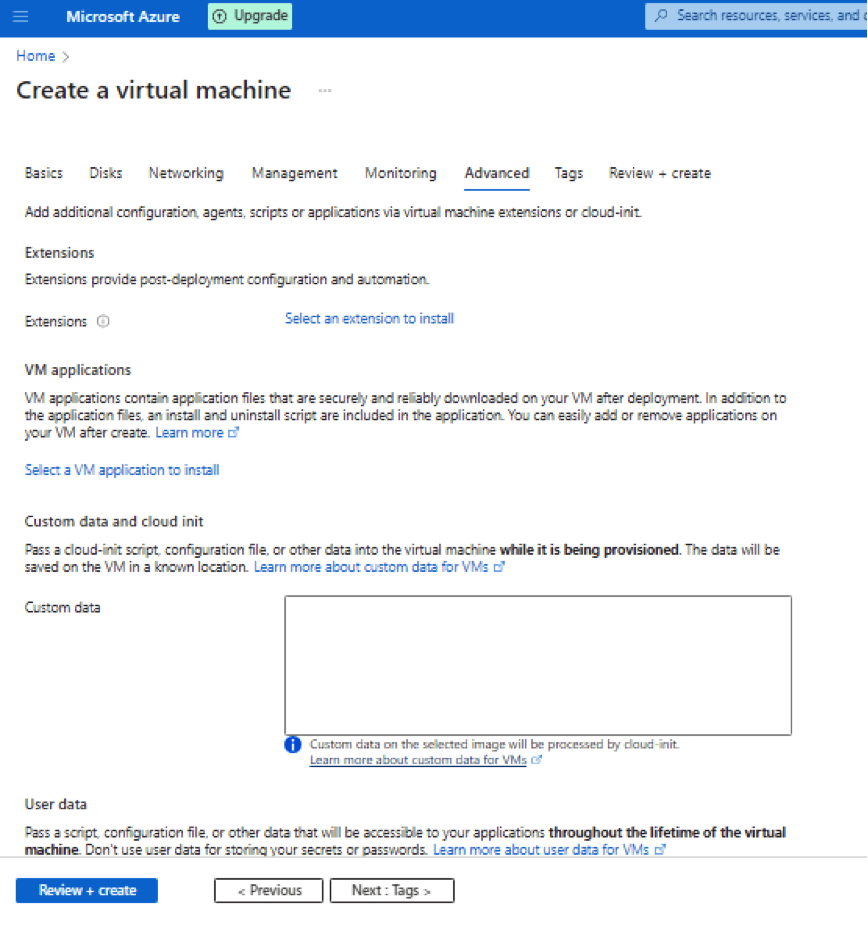
- Click on Advance it provides options to run script on VM start.
- Choose Tags default and go to Review+create it will land on below page to create VM
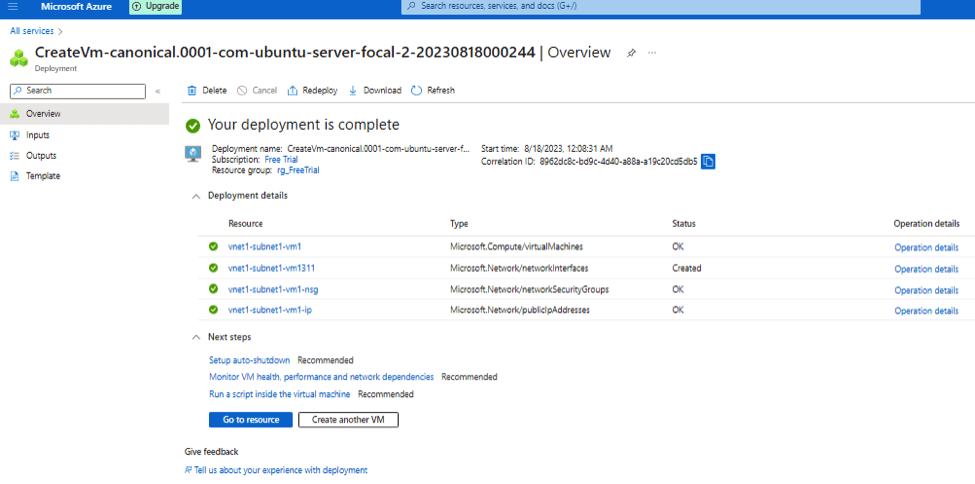
- Once VM created you will get below screen:
Create another virtual machine in the virtual network
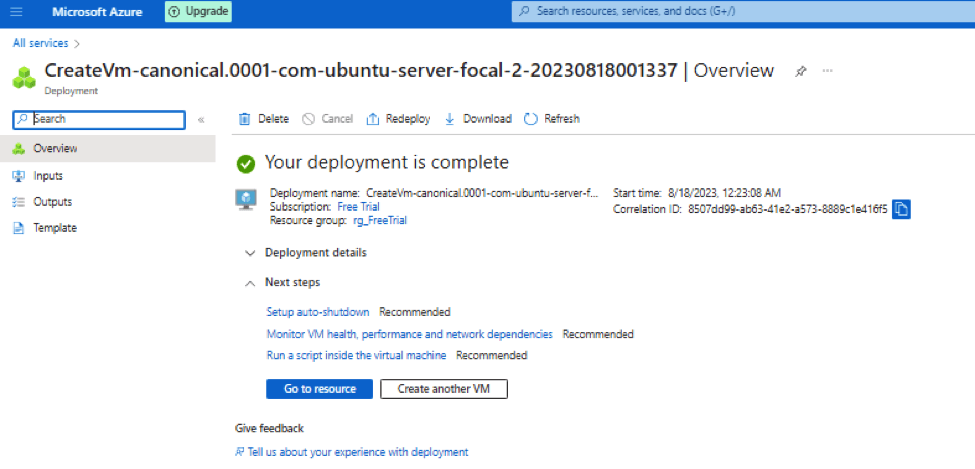
- Now we create another virtual machine in subnet2, will follow same steps above. After all Virtual machine 2 configuration we will get final screen for review:

- Now create VM2 and you will get:
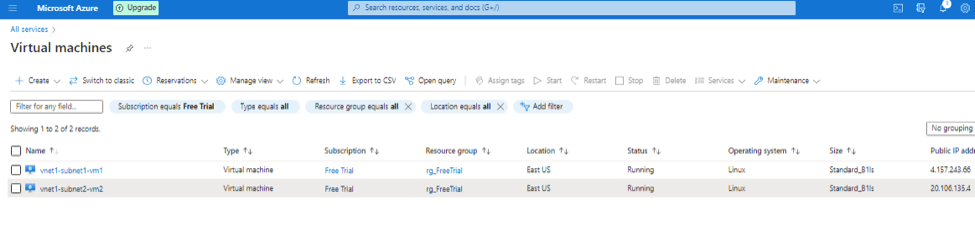
- When you got virtual machines you will see below output:
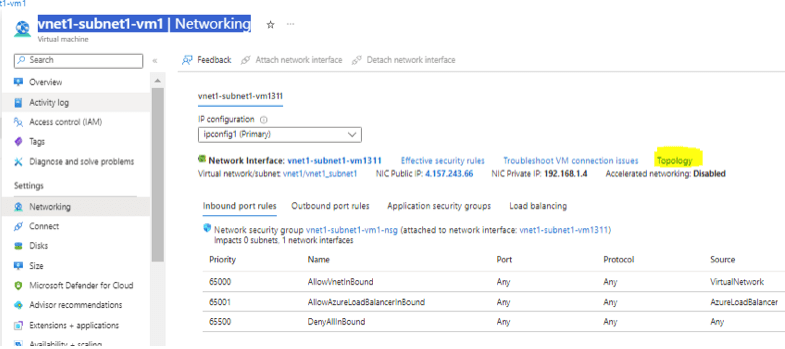
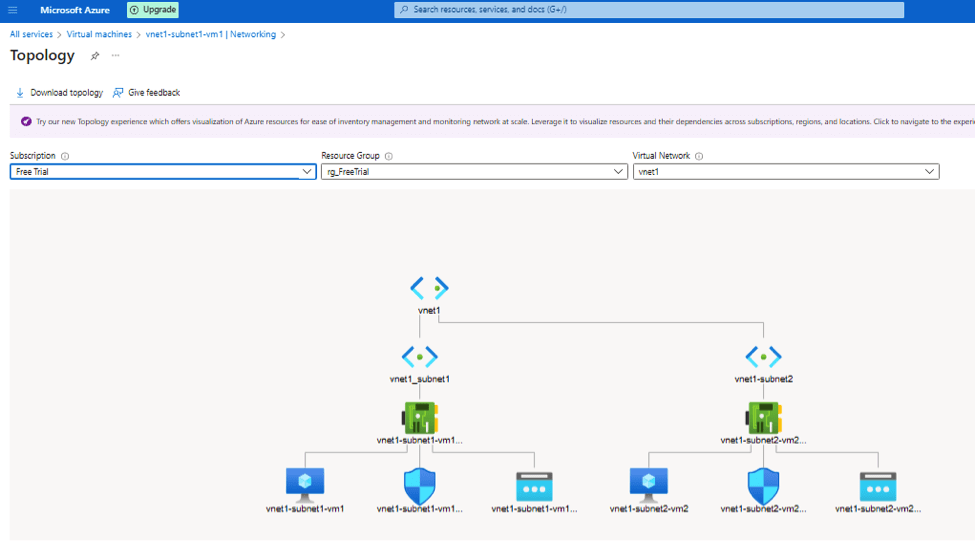
- If you go to any virtual machine > vnet1-subnet1-vm1 | Networking > on right hand side you will see topology.
- Once you click on it you can also download your topology from Azure.
- Click on it you will get final topology:
Allow SSH to Virtual machines in Azure
- Add inbound rule in VM > Networking as shown below. Click on Add inbound rule and allow SSH from anywhere.
- Rule highlighted in yellow in added one.
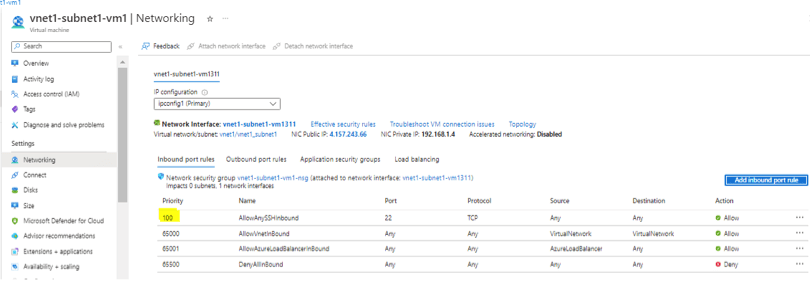
- Now you can SSH from internet.


Cyber Security Specialist with 18+ years of industry experience . Worked on the projects with AT&T, Citrix, Google, Conexant, IPolicy Networks (Tech Mahindra) and HFCL. Constantly keeping world update on the happening in Cyber Security Area.